Cloud environments are entirely software-defined. Cloud has some inherent downsides (opaque hardware troubleshooting!), but the pros vastly outweigh the cons. This includes something very cool - automated, desired-state tooling. Which in non-buzzword-speak means you can write some text configs to define what you'd like your environment to look like, point your tool at a cloud environment, and bam, you have new resources.
 Switching from the data center world to the cloud is a big undertaking, so I wanted to walk through a simple workflow that uses some automation tooling and makes it dead simple to start building your cloud skillset.
As an important aside - every tool and service we'll use in this walkthrough is entirely free. No better cost than free, right? Both of the Azure tools we're going to sign up for require a credit card, but won't charge you unless you take a further action - converting your account from "Free Trial" to "Pay as You Go."
I'm in infrastructure, not software engineering!
I know, I know. You have half a dozen Cisco certifications (at no small cost!), you're working on a Juniper certification, and you're great at this job. You don't feel like you need to learn this new and scary skillset. I get it, I was in those exact same shoes about a year ago.I've got bad news and good news. The bad news is DevOps (software engineering + infrastructure) is eating the infrastructure world. It's coming for you, whether you like it or not. The good news is, it's incredibly fun to learn. Most of the tooling is open source, well documented, and hotly in demand. And who really wants to spend more time configuring CoS on a Catalyst switch when you can be learning iterative loops to deploy dozens of subnets across the globe?
And after taking this first step, you're no longer an infrastructure engineer - you're a DevOps engineer. You'll soon be talking about Terraform, SparkleFormation, CloudFormation, Ansible, and approving pull requests. It's an exciting time, so let's get started.
New Scary Terms
Welcome, nascent DevOps engineer! Read over the following terms. If you know them, skip to the fun stuff below. If not, these will be useful as we build some pipelines.- Cloud- Hosted IaaS - Infrastructure as a Service. These companies permit you to build an entire computer network, VMs, security, etc on their networks and manage it. The big 3 are:
- AWS - Amazon Web Services
- Azure - Microsoft Azure
- GCP - Google Cloud Platform
- Git - An open source code repository management tool for both servers and clients. Due to its open source nature, you'll see all sorts of practical implementations like:
- GitHub - A very popular social-focused git repo. Code can be secured as private and accessed via keys. Many if not most of the open source projects that run the internet are checked in here, including much of the source code for Azure's Cloud product.
- Stash (now officially BitBucket Server) - Atlassian's git repo product is git on the back-end, but has a mature, user-flexible front-end for easy management.
- Azure DevOps - The $MSFT Azure DevOps product has its own git repo, and can do some cool CI/CD automation. See what CI/CD is below.
- Git Terminology
- Branch - A workspace for you to make changes in without affecting anyone else. When your changes are ready for prime-time, you'll create a Pull Request
- Pull Request - A request to merge some changes you've made on your computer into another branch, most frequently the "master" branch, where changes are collected and merged together into a single source of truth
- CI/CD - Continuous Integration / Continuous Deployment
- This concept is something which cloud embraces and enables - constantly making small tweaks to your environments in an automated, repeatable fashion. Rather than logging into an environment and clicking a few items, you can write code and push it in sequence to a dev --> qa --> stage, and finally, prod environments in sequence.
- Software engineers are more familiar with these integration steps, as this is a common practice in software development.
- In practice, this is the processing and tooling that permits code changes to be rolled out to environments in an ordered fashion to fit business needs
Sunny with a Chance of Clouds
First, let's sign up for the Azure Cloud.
- Visit the Azure Portal (https://azure.microsoft.com/en-us/free/) and sign up for a free trial with your personal email. This process is mostly self-explanatory, so I'll skip it.
- This free trial lasts 30 days, or $200 in credits, whichever comes first. Even after the trial ends, you'll still be able to access your storage for up to a year at no cost.

Now you can build Azure cloud resources by hand. Which is neat! Go nuts. But really, we want to do automation stuff, so let's move right into Azure DevOps.
Azure DevOps: Cloud Automation for your Cloud
Azure DevOps is a CI/CD (read: automation) platform that is also cloud-hosted. It can run all sorts of tools in a native, containerized environment, and has quick, easy hooks into the Azure Cloud. We'll use it to run Terraform code.
However, Azure DevOps is a separate service from Azure Cloud, so we'll need to sign up for it separately.
- Visit the Azure DevOps landing page and click on the "Start free" button. Follow the steps to sign up for an account. The landing page is here: https://azure.microsoft.com/en-us/services/devops/?nav=min
- Make sure to sign up with the same email address you used for your Azure Cloud account - that makes this drop-dead simple
- When ADO asks for your "project name" feel free to give it anything. I used a project name "Kyler Middleton"

Once you're logged into Azure DevOps you'll be presented with a blank summary of your project. The first step we'll need to do is integrate our Azure DevOps account with our Azure account.
- In the bottom left, click on "Project Settings"

- Then click on Pipelines --> Service Connections
- Click on "+ New service connection" and choose the "Azure Resource Manager" type

- On the page that opens to add a service connection, if all goes well, you'll see your subscriptions pop up! My free trial has expired so I'm on a "pay-as-you-go" plan. You'll probably select a Free Trial Subscription.
- For now, leave the "allow all pipelines to use this connection" checked

Now you have a working CI/CD pipeline account ready to go, and integrated with your cloud infrastructure. But we haven't really done anything yet. So let's build a terraform pipeline that can build us some cool stuff.


In that directory, run the "git clone" command followed by the string you copied from your repo. You might be prompted to accept the fingerprint of the repo you're connecting to. If you do, type "yes" and hit enter.

The files will replicate to your computer, and you'll see a new folder show up on your computer. It'll be called whatever your Azure DevOps repo is called. Mine is KylerMiddleton.

The files that we place in here will be accessible to git and can be pushed up to the git repo hosted in Azure DevOps.
> Adding some terraform code
> Using remote storage for the state file
> Building a "Build Pipeline" to stage artifacts
> Building a "Release Pipeline" to execute jobs
UPDATE: Part 2 is now posted, you can view it here: https://www.kylermiddleton.com/2019/06/lets-do-devops-build-azure-devops_28.html
Thanks all. Good luck out there!
Initialize the Repo
A good first step in building our pipeline is setting up a repo. The local one in Azure DevOps will do just fine. It uses git, a tool that if you're not familiar with yet, you certainly will be. Git is an open source tool written by Linux Torvalds of Linux kernel fame, and is used to manage files and collaboration at scale. It's incredibly powerful, but not very intuitive. Thankfully, Azure DevOps can help us initialize our repo to get started.
From Azure DevOps (https://dev.azure.com/), click on Repos --> Files
There are several ways to initialize this repo, but the easiest in this case is to click the "initialize" button at the far bottom. Feel free to leave the README checkbox on - we can remove it later.

Click Initialize and your repo will be populated with some files on the "master" branch. The master branch is an informal (not required by git software) but common practice. Usually when you want to make a change to the codebase you're working with, you'll open what's called a Pull Request (see definitions above for a better explanation).

The pull request is proposed combination of your "branch" of code into the master. Many branches can be created at the same time, and git helps merge the changes together in a meaningful way. Speaking of code, let's check a sample change into our shiny new git repo.
If you're on the 90% of the world on Windows, you're not out of luck. Git can be installed from here: https://git-scm.com/downloads
You may already have some keys on your computer. If you're on linux or mac, look in the .ssh (the leading period is intended) for a file called id_rsa (the private key, don't share this) and id_rsa.pub (the public part, we'll upload this to Azure DevOps). If you find those keys, you're in luck, and you can skip down a bit.
If you don't have the keys yet, that's okay, we can build them. Microsoft has a great walkthrough on how to build keys. The gist of it is to go to your home directory and run the following command from bash. Bash is a native shell on linux or mac, but not on Windows - the Git For Windows package will install a windows-compatible bash shell when it installs - run this command from there.
Remember to change the email@whatever to your email address. It doesn't have to match the login you use for Azure or Azure DevOps - it's more for you to remember.
ssh-keygen -C "email@whatever.com"
It'll output the id_rsa and id_rsa.pub files you need. Copy the contents of the id_rsa.pub (make sure it's the .pub one, that's your public - shareable - key) to your clipboard.
In the top-right of your Azure DevOps, click on your initials, then on "Security".

 Great, now your computer has an id badge to flash when it connects to your Azure DevOps git repo to identify itself!
First, let's start with Azure DevOps. Go to your repo by clicking on Repos --> Files in the left column. Then in the top right, click on "Clone" and change the tab to "SSH". There will be a "git@" string there. Copy that string to your clipboard - we'll need it!

Go to your profile's root location - your home directory. Your id_rsa private key should be in the .ssh folder here - on linux and mac it might be hidden because of the leading period. That's okay, the tool will still be able to find it.
Let's Get Git
You'll need git installed on your computer in order to push code. If you're on linux, it's probably already installed. If not, you can "apt-get install git" or "yum install git". If you're on mac, brew is probably easiest:If you're on the 90% of the world on Windows, you're not out of luck. Git can be installed from here: https://git-scm.com/downloads
Generate Some Keys
In order for the Azure DevOps repo to know who you are, you need to authenticate yourself with some SSH keys. SSH keys are commonly used rather than typing in a username and password. They're easier to manage and more secure than a username/password combo that can be guessed. Plus if you lose a key or have one stolen, you can just disable it.You may already have some keys on your computer. If you're on linux or mac, look in the .ssh (the leading period is intended) for a file called id_rsa (the private key, don't share this) and id_rsa.pub (the public part, we'll upload this to Azure DevOps). If you find those keys, you're in luck, and you can skip down a bit.
If you don't have the keys yet, that's okay, we can build them. Microsoft has a great walkthrough on how to build keys. The gist of it is to go to your home directory and run the following command from bash. Bash is a native shell on linux or mac, but not on Windows - the Git For Windows package will install a windows-compatible bash shell when it installs - run this command from there.
Remember to change the email@whatever to your email address. It doesn't have to match the login you use for Azure or Azure DevOps - it's more for you to remember.
ssh-keygen -C "email@whatever.com"
It'll output the id_rsa and id_rsa.pub files you need. Copy the contents of the id_rsa.pub (make sure it's the .pub one, that's your public - shareable - key) to your clipboard.
In the top-right of your Azure DevOps, click on your initials, then on "Security".

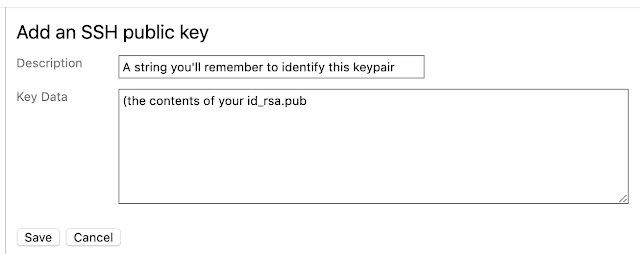
Under Security on the left, click on "SSH Public Keys", then on "add" on the page that appears.
Type a description that'll help you remember the keypair you're uploading, then paste the contents of your id_rsa.pub into the "Key Data" field.

Time to Clone the Repo
Once git is installed on your computer, let's "clone" (replicate) the files from our repo to our computer so we can start making changes.First, let's start with Azure DevOps. Go to your repo by clicking on Repos --> Files in the left column. Then in the top right, click on "Clone" and change the tab to "SSH". There will be a "git@" string there. Copy that string to your clipboard - we'll need it!

Go to your profile's root location - your home directory. Your id_rsa private key should be in the .ssh folder here - on linux and mac it might be hidden because of the leading period. That's okay, the tool will still be able to find it.
In that directory, run the "git clone" command followed by the string you copied from your repo. You might be prompted to accept the fingerprint of the repo you're connecting to. If you do, type "yes" and hit enter.

The files will replicate to your computer, and you'll see a new folder show up on your computer. It'll be called whatever your Azure DevOps repo is called. Mine is KylerMiddleton.

The files that we place in here will be accessible to git and can be pushed up to the git repo hosted in Azure DevOps.
Next Time
I intended to do all this in a single blog, but this is getting LONG! So I'll wrap up this one, and next time we'll discuss:> Adding some terraform code
> Using remote storage for the state file
> Building a "Build Pipeline" to stage artifacts
> Building a "Release Pipeline" to execute jobs
UPDATE: Part 2 is now posted, you can view it here: https://www.kylermiddleton.com/2019/06/lets-do-devops-build-azure-devops_28.html
Thanks all. Good luck out there!
kyler
Great post thanks a mill! Very big help.
ReplyDelete